Quick Links:
The Procedure activity type is designed to train any task that can be broken down into a series of simple, discrete steps. Proper hand-washing technique, how to make a Martini, a pre-flight checklist for a passenger jet, taking someone’s blood pressure, closing a shift at a restaurant — all of these tasks can be effectively trained by the Procedure activity type.
Learn Mode: Designing a Procedure for Deckspert
The Learn Mode for the Procedure activity type consists of a deck in which each card corresponds to a single, observable step in the procedure. The example shown below is “How to Slice an Avocado.”
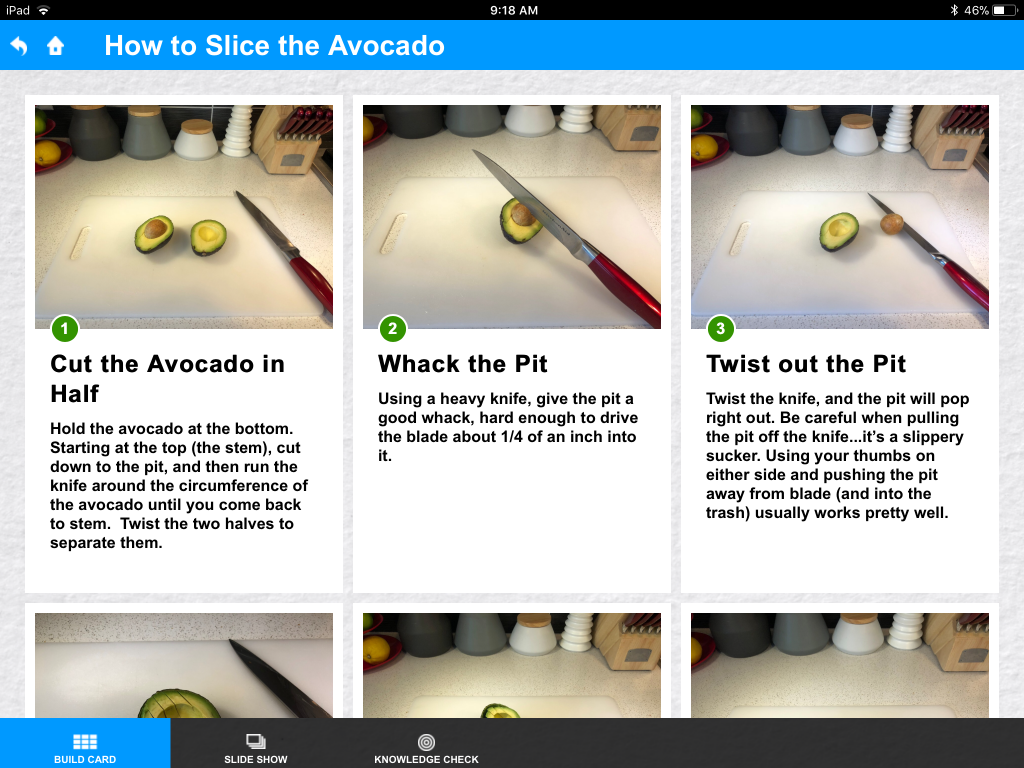
As you can you see, each step in the task contains a short title, a more detailed description, and an image showing the action.
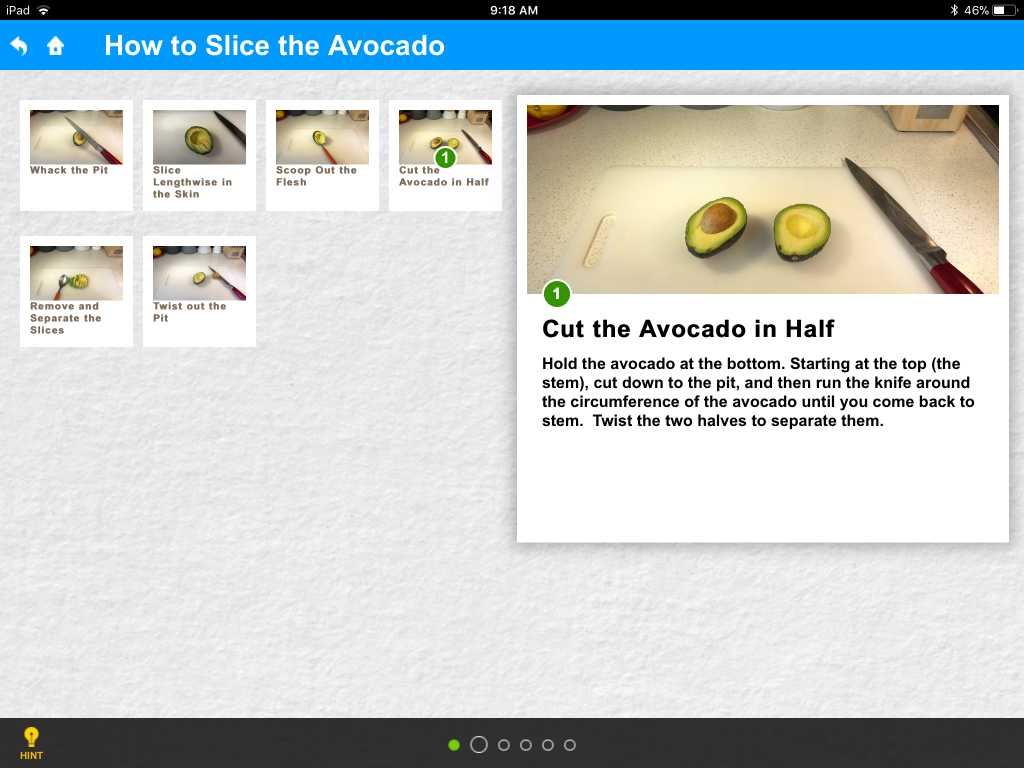
In slideshow mode, the same content is displayed to the learner in a larger format:

For the learner, the Procedure should function as both a stand-alone learning tool—a straightforward set of instructions for the task he/she needs to master—and as a performance support, just-in-time reference document—something he/she can look at on a mobile device while observing a trainer or a co-worker doing the task, and refer to later when a reminder of a particular step in the task is needed.
Tip: When creating a procedure, remember that a card should be your smallest teachable unit. If you find yourself trying to put multiple actions into one card, consider breaking it into several cards. If your deck is getting too long, try breaking out sub-procedures in to separate decks. For example, this “Cutting the Avocado” deck was originally part of a longer sandwich-making procedure that was broken out into four separate decks.
Designing an effective procedure for Deckspert isn’t difficult, but it does require some thoughtful planning in advance. Not only must you have a complete, hands-on understanding of the task itself, but you need to be confident that you’ve determined the very best, most efficient way of accomplishing it.
As with all Deckspert activities, the most important rule is to stay focused on what you want the learner to do instead of what you think the learner should know. Probably the best way to define your procedures for Deckspert is to simply observe your best performers on the job, as they’re actually doing the tasks you want to train. And if you can take pictures of them while you’re at it, you’ll find that creating a training module becomes a simple matter of adding concise labels and descriptions for each step.
Practice Mode: Designing an Effective Knowledge Check
After you’ve created a deck for your procedure and preview it, you’ll notice that a practice and challenge mode will have been automatically created for you. The default (automatically-generated) practice mode for your procedure is what we call a sequencing challenge: all of the steps in the procedure are now options for the learner, and the learner’s challenge is to select which comes next in the sequence.
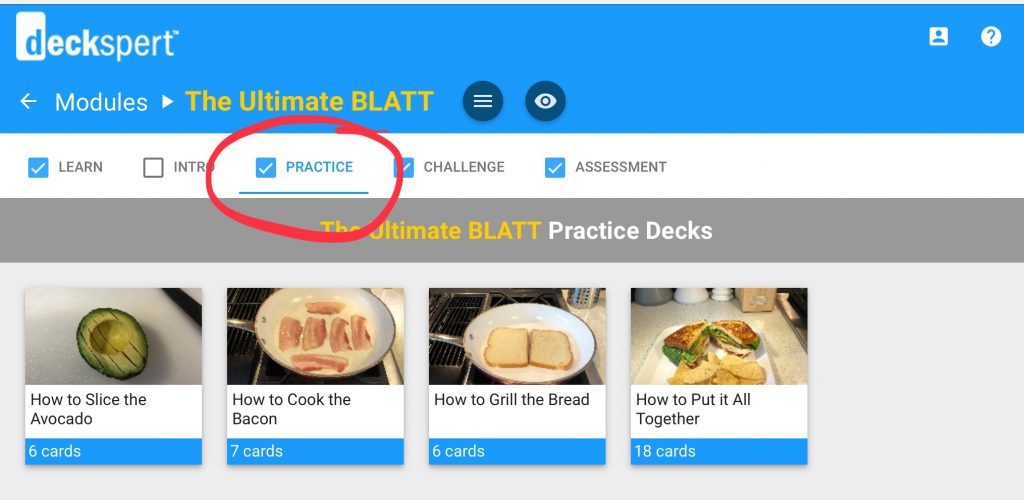
You can get to the practice mode editor in one of two ways: from the module level, click the Practice tab and then select the deck you want to edit.
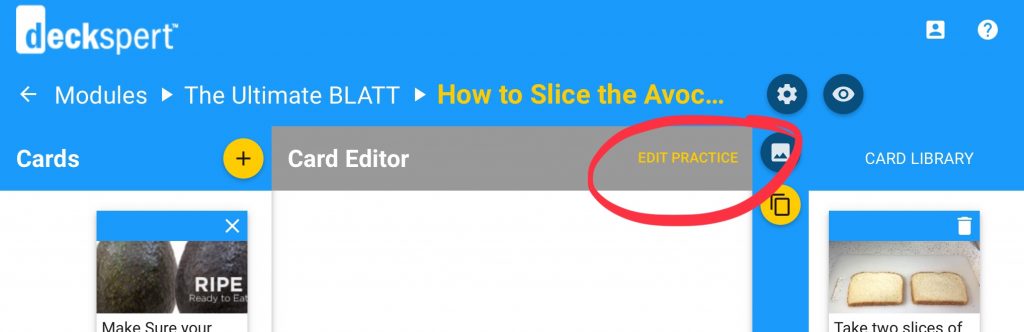
The second way is to select the “Edit Practice” link from the Card Editor view.
When you arrive on the Practice Editor screen, this is what you will see:
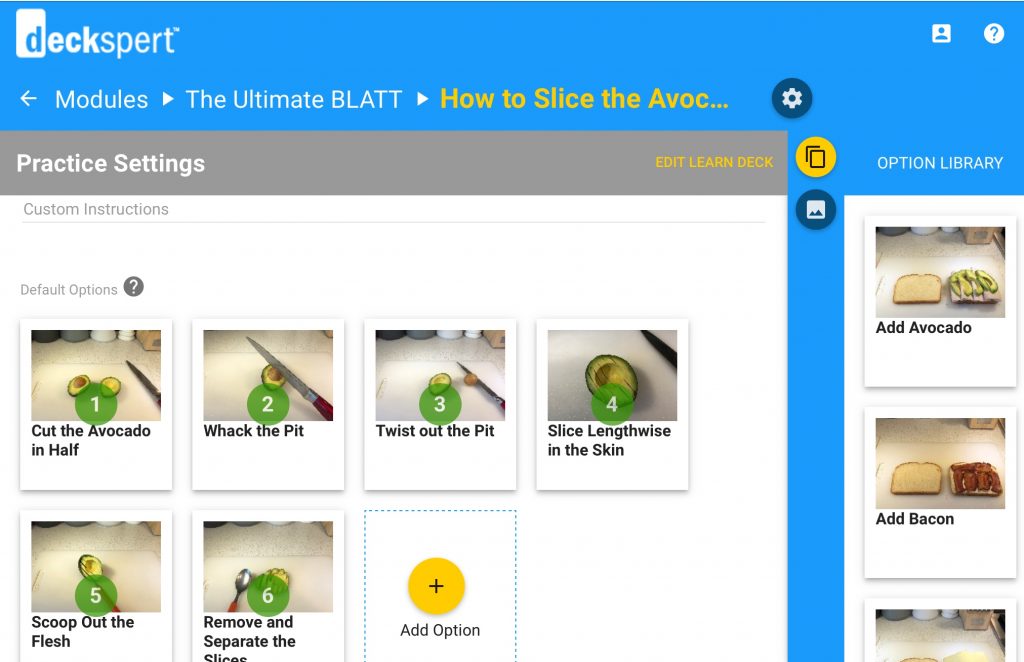
By default, the options presented to the learner are all of the available options (steps) in the procedure. You will see them numbered in the proper sequence, but the learner will see them in random order — the challenge is to select them in the right order.
You will also see an Add Option button at the end of the list. You can use this to add distractors to the quiz: incorrect answers that are designed to tempt the learner with options that seem right, but which represent common mistakes or misconceptions.
Pro Tip: When you’re taking photos of a procedure, don’t forget to take pictures of mistakes! You’ll be able to create a much more challenging practice and challenge for the procedure if you have images to use as distractors. Remember, it’s not much of a challenge to the learner if every answer is correct!
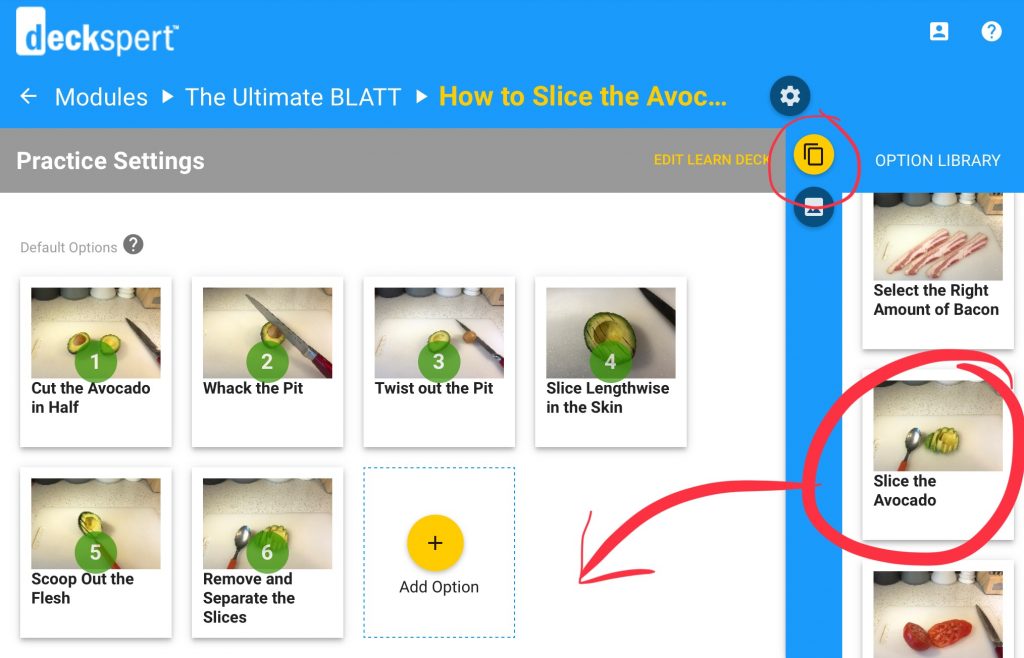
When you click, Add Option, you will see a new tile appear with the label “New Distractor.” You can edit the label directly, just by clicking on the text. To add an image, open the Image library on the right, and drag the image you want onto the tile itself.

The second way to add a distractor to the practice and challenge mode is to reuse one you’ve already created for another deck. When you click the top button on the library panel on the right, you will see your Options Library — a list of all the options from every deck in the current module. If you find one that works well for your procedure, you can simply drag it anywhere into the workspace to add it.
Depending on the length of the procedure, you will want to limit the number of distractors so that all the options will be visible to the learner without having to do much scrolling.
Challenge Mode
The Challenge Mode of the Procedure activity is no different from any other activity type. Essentially, it is timed “final exam” in which the learner must successfully complete the practice mode for all the decks in the module, at one or more levels of difficulty. For a more detailed discussion of how to configure the Challenge Mode, click here.
Assessment Mode: Validating Real-World Mastery
This section describes what the assessment mode for the procedure is and how to effectively administer it. For instructions on how to configure the assessment (changing the checklist labels, the timer, etc.), see Configuring Module Sections.
The assessment mode is arguably the most important aspect of the Deckspert training system, especially for the Procedure activity type. It is through the assessment that the training enters the real-world domain of the workplace, encourages live, person-to-person validation of the training material, and ensures that the learner has not only understood the content of the training, but can actually demonstrate the skills that are being trained.
The assessment is a proctored activity, which means that the learner physically hands the device to qualified observer — a manager or peer who has already been trained in the procedure — and that person uses Deckspert’s assessment mode to evaluate the trainee’s performance as he/she actually does the task in the workplace, under the real conditions of the job. Who that proctor is and how they log into the assessment will vary according to company policy, but you can read more about the login configuration here.
There is a “practice” option available to the learner as well. When the learner feels ready to undergo the assessment, but is not yet ready for the official evaluation, he/she may give the device to a co-worker and do a trial-run. The only difference is that no data from the “practice” mode of assessment will be captured or tracked, so the learner may try it as many times as he/she needs to without any results being reported.
As you can see in the screen shot, the assessment uses exactly the same images and content that you have already created for the deck.
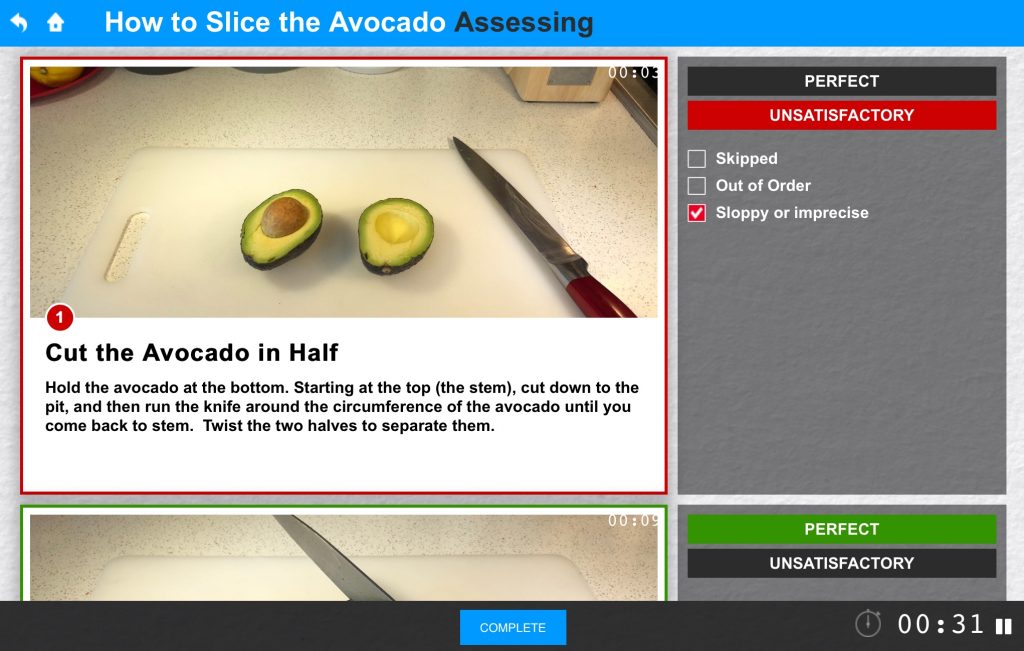
All the proctor has to do is watch the trainee and evaluate his/her execution of each step in the task. If the evaluator selects something less than “Perfect”, a checklist of options appears which allows the evaluator to specify what went wrong.
The assessment is timed, but be sure that the evaluator is aware of the Pause button next to the timer. If something comes up to distract the learner or the proctor, pausing the evaluation can allow the exam to continue later without a complete restart.
Pro tip: If product waste is a concern in administering a procedure (especially if food preparation is the topic), the proctor can always have the trainee act out the process with imaginary ingredients. As long as the trainee can demonstrate the skill adequately — by miming the actions and telling the proctor exactly what he/she is doing — using real product isn’t absolutely necessary.
When the trainee has completed the task, the proctor will click Complete, and the evaluation screen will appear, shown here:
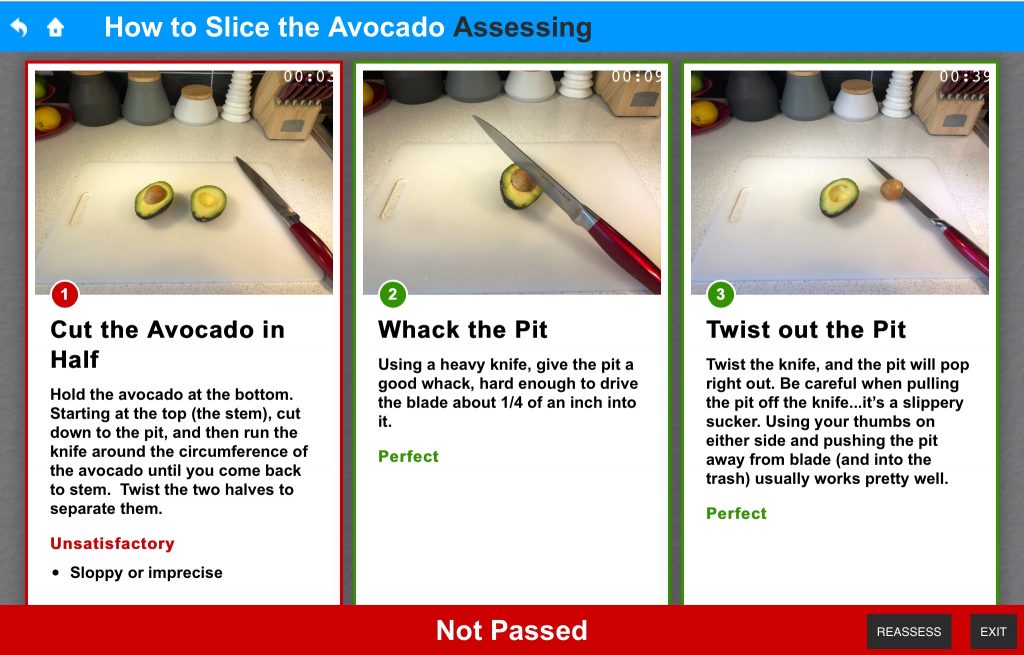
At this point, the proctor should reveal the results to the trainee, using the captured comments as a guide to provide coaching on what the trainee did well and what he/she missed or did poorly. If it seems that the trainee had trouble remembering the steps in the task, the proctor can recommend more time with the Practice and Challenge modes of the module. If the problems had more to do with execution, the proctor can suggest more shoulder-to-shoulder training time so that the trainee can observe, practice, and master the manual aspects of the task better.
If the mistakes were minor, a third option is just to run the assessment again in the moment. The proctor can repeat the assessment easily, by clicking the Reassess button on the evaluation screen.