As we have said many times before in this User Guide, the Assessment Mode of a module (especially the Procedure type) is the most important element of the Deckspert training system. While the default settings for the assessment mode will be sufficient in most cases, adjusting them to suit the needs of the tasks being evaluated can greatly enhance the effectiveness of the coaching when mistakes are made.
The assessment uses the same deck and card content as Learn Mode. The only elements to configure for the Assessment Mode are the ratings that the evaluator can give to the trainee, and the reasons for the rating.
The Ratings Settings
In the below screenshot you can see how the ratings configuration in the Assessment Settings view will affect what the evaluator sees in the output:
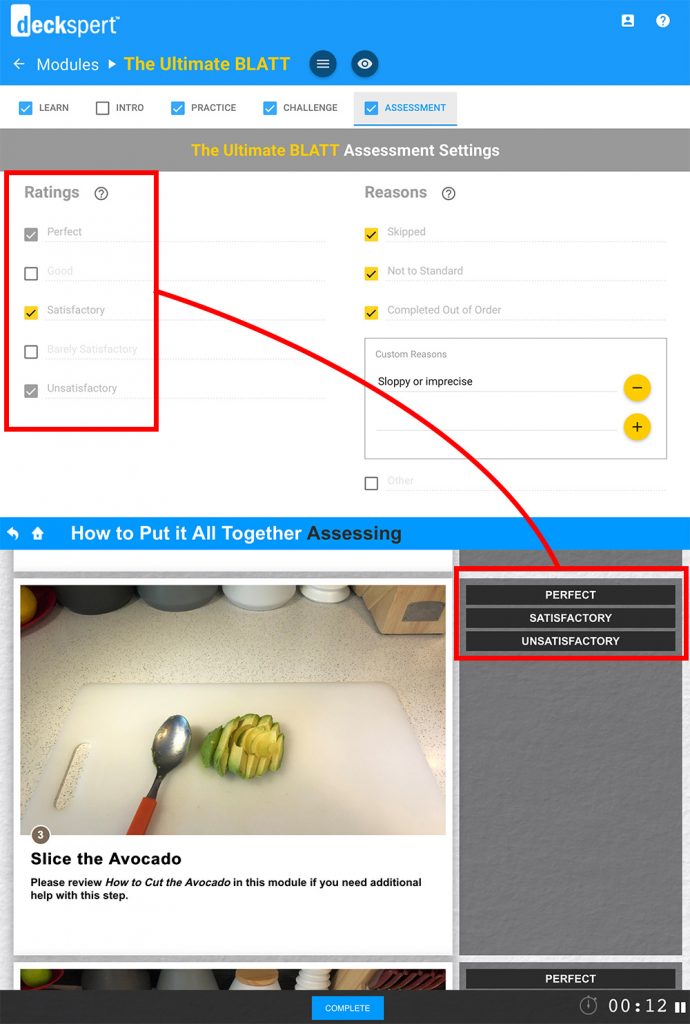
By default, Perfect and Unsatisfactory will always be enabled, and these two settings cannot be disabled since they correspond to the most basic pass/fail possibilities. You can add up to three other levels of evaluation, depending on the range of allowable error in executing a step that you want to afford to the trainee. In a Dialogue assessment, for example, there is much more room for ambiguity and nuance than in the sandwich-making procedure shown above. Therefore, affording a wider range of ratings options to the evaluator might make sense under certain circumstances.
NOTE: When you are configuring these ratings, it is very important to be aware that none of them will impact the overall pass/fail logic of the assessment as a whole. If the trainee receives anything above an unsatisfactory for all of the steps in the procedure, they will pass. The only way to “fail” the assessment is to receive an “unsatisfactory” rating on any one of the steps.
The recommended practice is to leave the ratings at their default setting. A simple binary makes the evaluation process easier for both the learner and the evaluator. If the “unsatisfactory” rating seems harsh, the “reasons” settings discussed next can offer a way to turn the negative impact of a failure into a valuable and empowering coaching opportunity.
The Reasons Settings
Whenever the evaluator select a rating lower than “Perfect,” the “reasons” checklist is displayed so that additional feedback can be captured on what exactly the trainee missed or did incorrectly. The screenshot below shows the Reasons settings in the Assessment view and the resulting view for the evaluator.
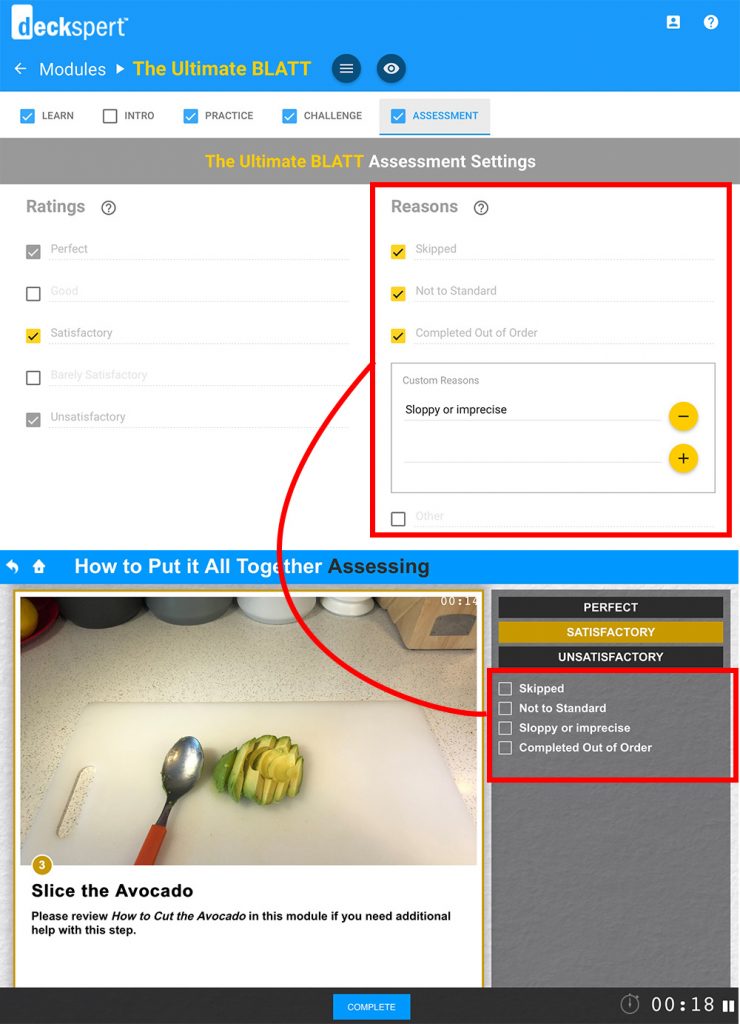
The default reasons are “Skipped,” “Not to Standard,” “Completed Out of Order” and “Other.” Each of these can be removed from the list by deselecting the checkbox next to it. You can also add custom reasons by entering them on the text line and clicking the plus button next to it. “Sloppy or imprecise,” in the above example, was added to this module to describe a mistake that might disqualify a trainee from a “Perfect” performance.
Once the assessment of this deck has been completed, the evaluator can share his screen (shown below) with the trainee.

As you can see, the disqualifying reasons for the less-than-perfect rating is displayed so that both the evaluator and the trainee can see and discuss exactly what went wrong. The “reasons” checklist should be used as a substitute for the kind of notes that an auditor or trainer might make when observing the kind of procedures or tasks covered in the module. Since the assessment itself proceeds too quickly for the evaluator to type written notes in the moment, try to use the reasons checklist to be as specific as possible in terms of listing common mistakes. Kind in mind, though, that this checklist will apply to every deck in the module, so keep it generic enough to apply across the variations among those decks.